

Getting to know how to rotate screens in Windows 10 may be helpful in several situations. We all are familiar with and used to rotating screens on our phones and tablet devices.
But did you know that you can rotate the screen on your computer too?
While Windows 10 has many features at its disposal, it also allows you to change screen orientation on your laptop.
So, whether you have a touch screen laptop, windows tablet, or any computer with a display stand, you can take advantage of this great feature.
You can rotate the screen to portrait display orientation for all reading and writing activities and rotate back to landscape for surfing and watching activities.
Sounds cool? Do you want to learn how to do it?
In this article, we are teaching you three super easy methods to rotate the screen on a Windows 10 computer. So let’s get right into it!
Table of Contents
How to rotate screen in Windows 10
Through a keyboard shortcut
To flip or rotate your computer screen at certain angles, you can use the keyboard shortcut Ctrl+Alt+Arrow keys (UP, DOWN, LEFT, RIGHT).
Each arrow key in combination with Ctrl + Alt can rotate/flip your screen to a certain angle. Let’s learn all shortcut key combinations so you may rotate the screen window in whichever way suits you best.
- Up Arrow key – default landscape mode: Press Ctrl+Alt+Up key to set/ bring back display into its default landscape orientation;
- Down Arrow key – landscape flipped mode: Press Ctrl+Alt+Down key to flip upside down your default display orientation. For example, you rotate your Windows screen to 180 degrees in landscape orientation with this key combination;
- Right Arrow key – portrait flipped mode: Press Ctrl+Alt+Right key to flip the screen in portrait mode. You rotate your screen to 270 degrees in portrait orientation with this key combination;
- Left Arrow key – portrait mode: Press Ctrl+Alt+Left key to set the display into portrait display orientation. This key allows rotating the screen at 90 degrees vertically.
Note: If you don’t find it convenient to use a computer in either portrait or flipped screen, you can always revert and rotate to default landscape display orientation with the Ctrl+Alt+Up hotkey.
Through Windows display Settings app
- Press the Windows key + I to open the Settings app;
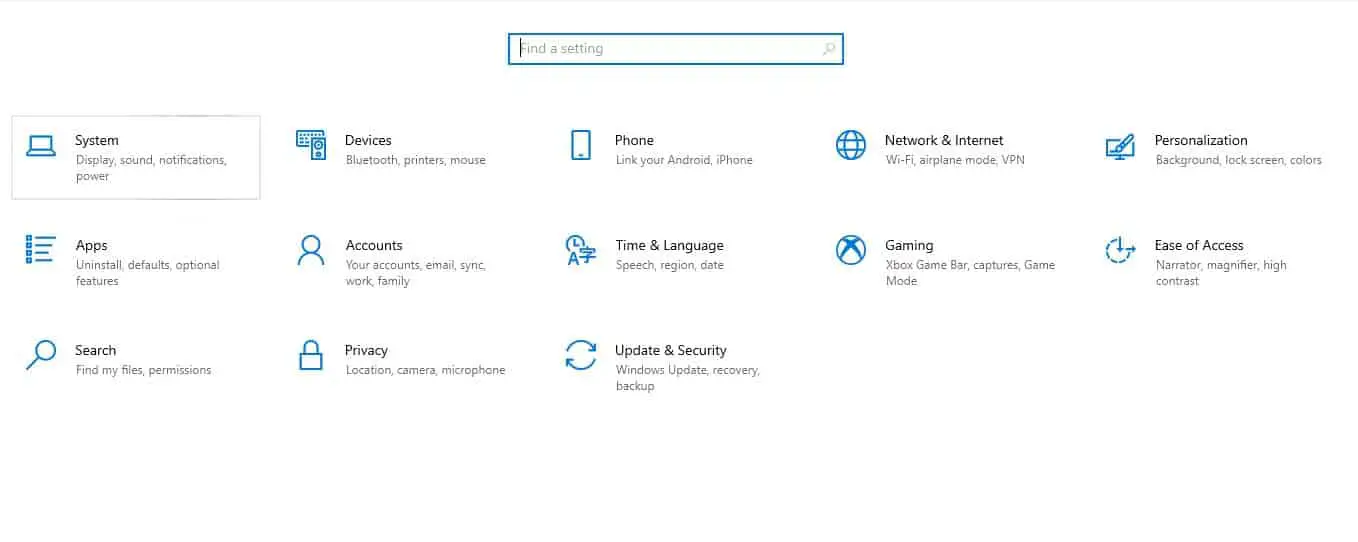
- Click on the “System” tile and then “Display” from the left pane;

- Or right-click on your desktop or laptop screen, and select the second last option: “Display settings”;

- A new window opens. Scroll down in the left window pane to Display Orientation and click. A drop-down menu appears with all screen orientation options available (landscape, portrait, landscape flipped, portrait flipped);
- You can simply click on desired screen orientation, and Windows will apply it on your PC screen;
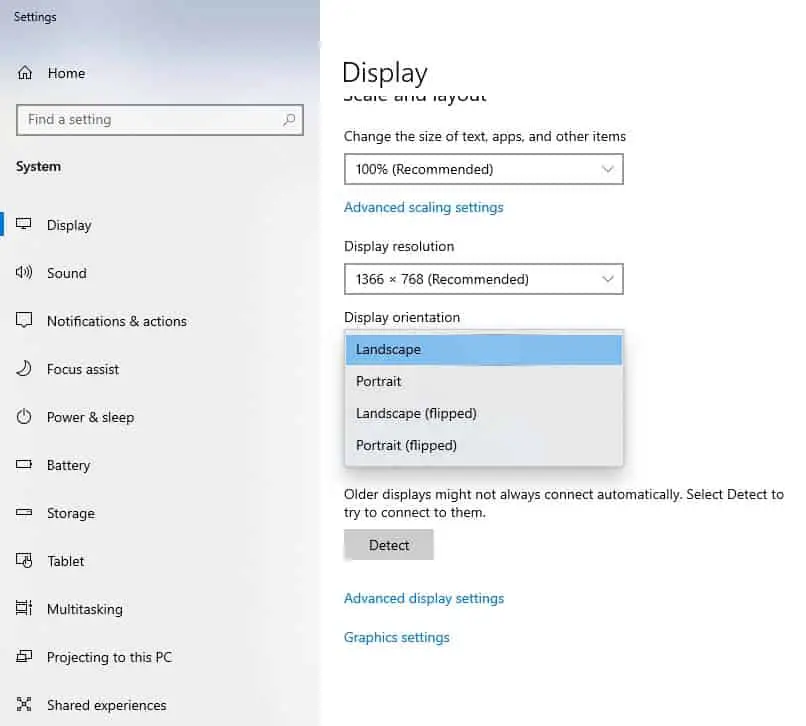
- Click on “Keep changes” to rotate and set your screen in the desired orientation.
Through graphics card Control Panel
Another reliable method to rotate the screen in Windows 10 is through the graphics card Control Panel.
Now, there are different kinds of graphic cards installed like Nvidia, Intel, and AMD.
However, most graphic cards have pre-installed control panels, so it is easier for you to navigate through them and rotate the screen.
For Intel graphics card:
- Right-click on the desktop screen and click on “Intel graphics settings”;
- You can then set screen rotation according to your requirements.
For AMD graphics card:
- open the AMD graphic card control panel, right-click on the desktop and click “Catalyst control settings”;
- You can then navigate to rotate the screen segment found under “Common display tasks”;
For NVIDIA graphics card:
- Navigate to the NVIDIA control panel by right-clicking on the desktop display;
- Click on the “Rotate display” option to rotate the screen in the desired orientation.
or
- Right-click on the desktop and go to Graphics options?Rotation;
- Under “rotation”, you can click on available options to rotate the screen at a certain angle.

How to turn off automatic screen rotation in Windows 10
Windows tablets and touch screen laptops do automatically rotate the screen as smartphones do.
But do you know that just like your cell phone, you can also lock screen rotation in the Windows interface?
Well, thanks to rotation lock, you can. To turn off the rotation lock, perform the following steps:
- Press the Windows key + I to open the Settings window;
- Click on the “System” tile;
- Click on “Display” from the left window pane;
- Find the “Rotation lock” feature in the right window pane;
- Toggle the switch towards the left to turn off or toggle towards the right to turn on screen rotation.
or
- Press Windows key + A;
- A mini Display Setting window opens on the bottom left corner of the screen. Now, simply click on the rotation lock option to turn it on or off.
Note: If you cannot locate the auto-rotate feature in any of the abovementioned areas, likely your Windows version doesn’t support it.
Wrap Up
Windows 10 has many other latent features to enhance and ease your Windows experience, like the screen rotation feature.
We love to unveil those useful features so you may use them optimally on any Windows device. To learn more about Windows 10 features and how to use them, you can check our website.
Check out some of our other awesome articles:
- Changing the DNS in Windows 10
- How can I flush DNS in Windows 10?
- Finding and changing IP address in Windows 10
- How can I clear the clipboard contents in Windows 10?
- How can I open Task Manager in Windows 10?
- Changing the language in Windows 10
- How to show the battery percentage in Windows 10?
- Changing Windows 10 default folder view
- How to fix Windows 10 night light when it’s not working
