In this article, you’ll learn how to fix Windows 10 night light not working. You might have often heard of the term “blue light”.
It’s an expression to designate the emitted light from the screens that surround us in our everyday life.
Whether it’s the TV or the smartphone, all of our device’s screens emit blue light rays. The problem is that this cold is not the best for our eyes.
That is why several solutions have been brought forward to save the eyes from blue light.
Some of them include anti-blue light glasses or anti-blue light screen protectors.
Another one is the night light feature that can be activated in smartphones and computers, changing the settings to display a .
This feature is offered by Windows 10 and it minimizes the negative impact your computer screen has on your eyes by filtering out the blue light.
However, sometimes it does not function the way it is supposed to.
Users who spend a great deal of time in front of their screens may struggle in handling the on their PC.
Today, we will be showing you guys what you can do if your PC fails to enable the night light feature for you.
Table of Contents
How to fix the Windows 10 night light not working
Common night light issues
Why is the night light not working on Windows 10? Here are some of the most prevalent issues that users face with the night light feature:
- Night mode not turning on at the scheduled time;
- Night light not turning on at all;
- Windows 10 not allowing you to turn the night light button on.
However, you don’t need to worry as these problems can easily be solved.
In unfortunate events where the simple methods don’t work, you’ll have to refer to the last resort and dive deep into your Windows 10 settings to get rid of the problem.
Let us start with the solution to the first most commonly-faced night light problem.
Night light not turning on at night
It is often the case that the night light does not turn on when you want it to. By default, your PC turns it on at a specific time after sunset. If it fails to do so, the reason behind it is the faulty time/location settings that stop your Windows 10 PC to enable the night light when it is needed.
All you have to do is adjust the time/location settings as per your region and your night light will turn on automatically at night. Here’s how you can get your time/location settings straight.
Changing location settings
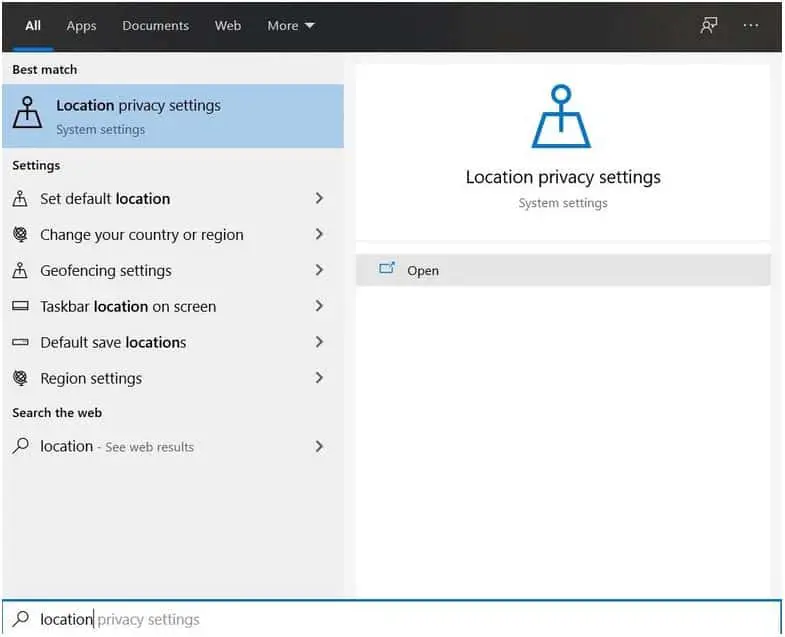
- Firstly, head on to the Windows Start menu and type “location”. The “Location privacy settings” will show up. Click “Open”;

- With the location settings on your screen, click on “Change” button as you see in the image below;

- Turn on the “Location for this device” option and restart your computer.

If the night light still does not turn on at sunset after turning on Location access, then time settings are likely the reason. So, let’s see how you can adjust your time settings.
Changing time settings
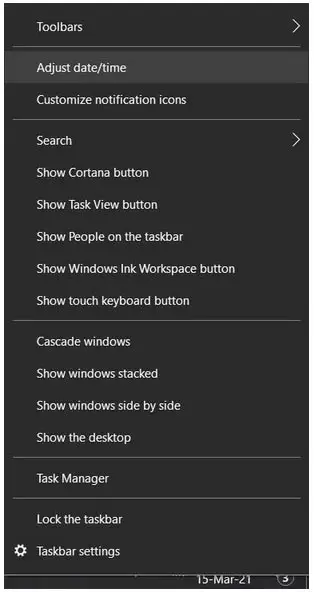
- Right-click on the time/date box displayed on your taskbar at the bottom right of your screen. Click on “Adjust date/time”;

- Did you find the “Set time automatically” switch? Turn it on. Your PC will automatically adjust the time according to your location;

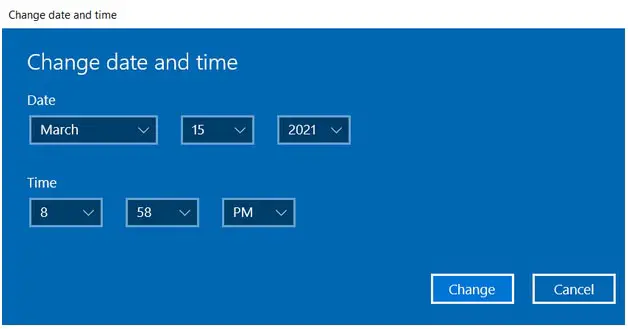
- If this doesn’t work either, then change the time manually by clicking on the “Change” button under “Change date and time”;

- Set the correct time in the given boxes and click on “Change” to save your changes.

The night light not turning on at all
If your PC’s night light does not turn on at all, there’s a high chance that your display driver software needs to be checked. Drivers are often the cause of minor errors in Windows 10, and the best way to make them work properly is by updating or reinstalling them.
Your graphics card plays a role in this and you’ll have to check if the latest drivers are running smoothly on your computer or not.
In case your driver is outdated, you can download and install a new one so that you can say goodbye to the night light problems.
Follow these steps to install the latest driver:
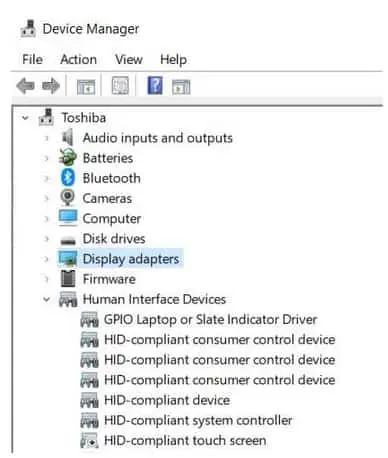
- Click on the Start button on the bottom-left of your screen and type “Device Manager”. Click “Open”;

- A window will now pop-up where you can access your hardware settings. Look for “Display adapters” and click it;

- In the drop-down menu, you’ll see which GPU your PC has, and you can download its latest driver from the manufacturer’s official website.

From there you’ll see the model of the graphics card your PC is using.
Now, if you have an Intel GPU, you’ll have to head to Intel’s official website to download the latest compatible graphics driver software.
However, if your PC has an AMD or Nvidia GPU, visit the AMD or Nvidia website to download their driver.
We’ve provided links to the websites of the three most popular GPU manufacturers. You can visit the given address and download the required driver software:
Windows 10 not allowing to turn the night light on
Up till now, we have provided solutions for the two most commonly-faced issues related to the night light on Windows 10. However, there’s a third known problem and it usually occurs due to mishaps in the registry.
This rare problem arises when a user is unable to turn on the night mode button because it is grayed out.
Unless the previously-mentioned ways don’t work out for you, your last resort is to make some changes in your Windows registry.
The process is a bit complex but it will surely get rid of the problem from its roots.
So, without further ado, let us show you how to reset night light settings from the registry.
Editing Windows Registry
Note: Before we start, we’d like to point out that you should not be making changes in the Windows registry unless you have to.
The smallest mistakes in this procedure may lead to serious problems and harm the operating system.
Therefore, we advise you to make a full backup before proceeding to minimize the risk of loss if things go wrong.
- Open the Windows Start menu and type “Regedit” (Registry editor). Open the Registry Settings app that pops up on the side;

- You’ll see a few folders here with drop-down subfolders. Follow the path exactly as given in the address below;

- After you open the last “Cloud” folder, you’ll find a few more subfolders inside. Only the first two key folders are of your interest;

- Right-click on the first folder and delete it. Do the same with the next. Remember, only the first two folders are meant to be deleted;

- Restart your computer. Now, if you did everything as it should, you’ll be able to turn the night light feature on.
Hopefully, after this, your night light feature won’t bother you anymore.
Wrap Up
The can be really useful, especially for users who spend plenty of time in front of their screens with high levels of brightness.
It reduces the amount of blue light at night time. The reduced blue light will result in less eye strain, better sleep, and overall healthier eyes.
Apart from that, you can set a custom timer setting of your preference and program Windows to turn the Windows 10 night light mode on/off at a specific time.
You can also set the intensity of the blue light filter by accessing the night light settings.
With the help of the above-mentioned procedures, you can fix night light problems and give your eyes the comfort that they need.
We hope our guide proves to be helpful.
Check out some of our other awesome articles:
- Windows 10: the pros and cons of using it
- Deleting backup files in Windows 10
- Changing the screensaver in Windows 10
- How do I change folder icons in Windows 10?
- Guide to install Windows without losing data
- Is WinZip needed in Windows 10?
- How can I create a Windows 10 backup image?
- Blocking programs from accessing the internet in Windows 10
- Turning on/off Airplane Mode in Windows 10
- How to run programs as administrator in Windows 10?

